 Flashing back to July of 2013, I was thinking about conventions, and how much I missed costuming at said conventions. This had me start setting the goal that I called “Costume Initiative 2014“. My goal for this year was to complete an X-Wing Pilot from Star Wars, a uniform from Star Trek Enterprise, N7 armor from Mass Effect, and a Vault Dweller from Fallout 3. Well, we’re now in November, and while I can’t say I’ve hit all of that, I’ve hit something.
One week before Halloween, I had an epiphany on exactly what I wanted to wear. I had received this Vault 101 Jumpsuit as a birthday gift, and it was still sitting in my closet, one of the few things that still fit me as I gained the Geek Gut. With that, and a black pair of work boots, I had the jumpsuit down, but I couldn’t just wear the jumpsuit to a party. At the very least, I needed a Pip Boy 3000, or a close facsimile of one.
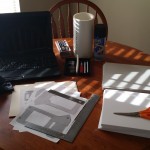
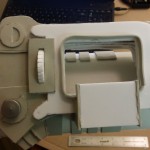
Luckily, as I’d been looking into this for a while, I have a file full of Bookmarks in Google Chrome for tutorials and information on Fallout props and costumes. Since ordering a kit was out, and 3D printing was cost prohibitive, two links really helped me figure out what I was doing. The first link was to a site from Full Metal Sam, talking about constructing a Pip Boy out of craft foam, complete with patterns. The second was a thread from The Replica Prop Forum, or The RPF, which was from the same person, just with a few more details, and a lot of questions answered! With that information, I armed myself with the listed supplies, as well as a 4″ PVC Pipe, and started getting to work.
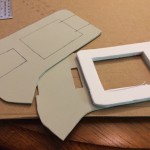
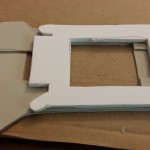
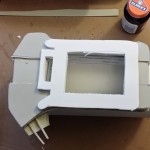
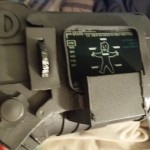
Keep in mind: I started this on Sunday, October 26th. This was to be quick, dirty, and probably not 100% accurate. Besides, I had never worked with foam sheets, and I was on a tight budget. Plus, in all honesty, the last costume piece I had really crafted was a holster for my Rebel Fleet Trooper costume, about eight years ago. However, into the void I went, trimming out foam and gluing it together, I worked on this Sunday, after work Monday, and after work Tuesday when I attached it to the PVC pipe. Wednesday night, I hit the entire piece with Plastidip, to help “seal” the foam and prep it for painting. Thursday night, I hit it with some “hammered metal” spray paint, since I knew I wouldn’t be able to do any weathering. That night, I also took a copy of the screen, glued it to some foam, and let it dry overnight. Halloween morning, I had a piece that, while not accurate, was a fairly solid representation of what you see in the video game.
With the paint still tacky, I slid on the jumpsuit and threw on the Pip Boy. Outfit as close to complete as it was going to be for Halloween!
I was happy enough with it, and everyone who was familiar with the game knew what it was, so that was a win! Are there things I wish I had done differently? Sure, but this is version 1.0, so of course there are going to be changes. Buttons, lights, detail pieces, and knobs are currently missing from the Pip Boy, and a 4″ pipe doesn’t have the taper the piece needs to stay on your arm well. The jumpsuit is baggy, missing the belt and shoulder piece, and really could be worn a bit, and have some straps added, as well as some armor. However, for a week before Halloween, and about $30 in materials for the Pip Boy, I was satisfied.
So how about you? Did you throw together anything for work or parties last weekend?
Tony

Can I chat with this Pip-Boy creator for more info?? Thanks 🙂
It’s quick, it’s sloppy, and all the sources I used are right there in the post! However, if you have further questions, drop me a line at HeadGeek@IndianaGeeking.com, and I’ll answer what I can! – Tony