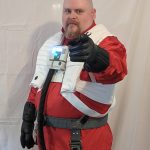
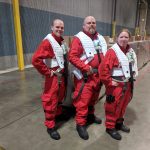
 It has been a year since I last wrote about this, but it’s been a heck of a year, too. I lost one job, gained another, starting helping two new podcasts, and started seriously looking into 3D Printing. You know, a lot of time-consuming stuff, so it shouldn’t be a surprise that it’s taken me this long to not only get this costume to the “good enough” stage, but to also write about it. When I last wrote about this (link), I had given myself a goal of December 15th. Yeah, turns out that didn’t happen. So, what did happen?
Well, as I said in the last post, at the time, “All I really have left to do is finishing the helmet, finishing the harness, cleaning and attaching the connection from the chest box hose to the flight suit, and weathering.” At this point, most of all that is done. Mostly. So, here’s where we’re sitting.
Belt and Ejection Harness
Local Star Wars fan, miniature painter, gamer, and all-around awesome guy Cliff Snyder had put together some instructions on how to make the harness for the pilot, and posted it up on the Rebel Legion forums. For those who don’t know, the “harness” is the grey belt and straps that go down the outside of the legs, with a bunch of hardware on the front. These instructions named all of the parts needed: 1 or 2 PLCE roll pin belts (I needed two, as a man of weight), roll pin buckles, some screws, some webbing, a couple of machined aluminum paddles, and some primer or fabric paint. I had bought all of these items early in 2018, and had gone so far as to start tearing apart the two roll pin belts to be able to turn them into one belt before putting them all into a canvas shopping bag and setting them aside.
Fast forward almost a year, where the parts came up missing, were then found again, and were spray painted (from green to grey) before Lizz kindly offered to take the instructions, put a better needle on the sewing machine, and get them put together for me. After some trial and error, she got an awesome looking belt and ejection harness put together for me!
Connecting the Chest Box Hose to the Flight Suit
By this point, I had decided my new goal was to have the costume ready by the weekend of May the 4th, because Star Wars Indiana (link) had many events they needed costumed members to attend, and I wanted to help out. By the end of April, all that really needed to be done to make the costume wearable to events was to get the chest box hose attached to the flight suit. First things first, I was advised by one of the members who had done this piece that the easiest way to deal with it was magnets. First, you would put on the chest box, and figure out where the hose would end up on the costume, and trim off the rest. Then, after “installing” magnets onto the connector, you would glue/zip tie/otherwise permanently attach the connector to the hose, and then use a second magnet on the inside of the flight suit to hold the one in the connector.
So, I ended up ordering some magnets off of Amazon (Affiliate Link) last October, and just had them stuck to the ductwork in the basement until it was time to put this together. With my final goal approaching, I took my Dremel to the bottom of the hose connector, cleaning out a spot big enough for a magnet to sit flush in. Then, I glued the magnet in, finished spraying it with primer, and then hit it with some aluminum paint before giving it a wash, so it looked nice and worn. Then, I took another one of those magnets, encased it in some scrap craft foam I had laying around, and that’s what I used to keep it on the costume. The magnets are easily strong enough to keep everything together, and now everything was done!
Wrapping Up
I was able to get everything done in enough time to get the costume approved in The Rebel Legion (link) and do a bunch of events on May the 4th. In doing these, I was able to start figuring out what needed fixed, like we actually have to make the belt and ejection harness smaller (!!!), and we had to fix a popped seam that gave out because I needed to kneel, and struggled to get back up.
I’m not as young as I used to be.
With all of this, everything was pretty much “done,” but I still had a few things left to do. First up was bringing the flight suit and vest over to the aforementioned Cliff Snyder’s house to get a good weathering on. He showed me how to dilute the paints, and how to apply it to fabric so it looked like dirt and oil stains. With this done, the suit now matched my weathered chest box, hose connector, and leg flares!
I also had the helmet to worry about. I was not happy with the paint job I posted about last year, so I took some advice from Michael Smith, who was used to stripping and repainting these helmets, bought some new spray paint that was all the same brand, stripped the helmet and repainted it. When I was happy with the base colors, I started to reassemble it, and I realized too much time had passed and I no longer had the reference photos I took when I disassembled it! Once again, Michael came to my rescue and not only helped me get the helmet properly reassembled, but also printed out some insignia decals to add to the helmet, and gave me tips on how to weather the helmet. Sadly, my first attempt was done in a room with poor lighting, and I had thinned the paint too much, so it dripped all over the white helmet. Luckily, I can get it cleaned and try again, but it was rather disheartening. You can see pictures below.
There’s still small stuff to be done now, like re-weather the helmet, and make a holster and blaster pistol, which aren’t really required, but since I have a pistol to build, I might as well. Still, it’s enough to give this wrap-up, and call this project done. I have people I’d love to thank, though, who I’ve name-dropped over the past almost two years.
- Phil Kellar – Made the flight suit, the vest, the leg flare holder, and gave me the 3D printed kit for the blaster, as well as a lot of the extra webbing/straps for the belt and ejection harness.
- Michael Smith – What didn’t this man do? He designed the lighting boards for everybody’s chest boxes, he installed them, he assembled and painted my chest box, he helped me get the “paddles” for the ejection harness, and he helped me get the helmet wrapped up, together, and provided decals. Some of this was paid for, but a lot of it wasn’t, and I’m in his debt.
- Lizz Schunn – For being patient with me as I slowly worked through this, and assembling the belt and ejection harness for me.
- Cliff Snyder – For tips on the belt construction, including answering my questions about sewing machine needles, and showing me how to weather fabric by essentially doing all of the weathering work on my flight suit and vest.
If it wasn’t for them, I’d probably have just spent the money on Taco Bell, and I wouldn’t have this costume that was listed as one of my bucket list costumes about four years ago (link).
So we’re going to post some more pictures, and stick a fork in this, calling it done. If you want to see what happens to the helmet, and the blaster, keep an eye on my Geek Building social media accounts!
Thanks for reading, and I’ll get some 3D Printing updates up soon!
Tony

Leave a Reply